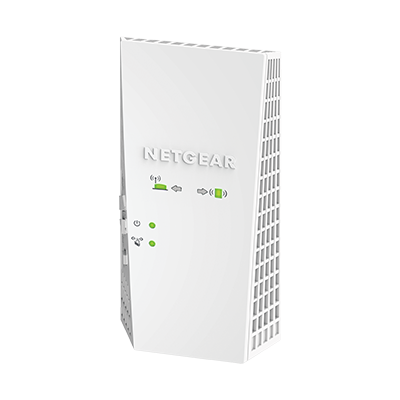
Netgear AC1900 Extender Setup
An AC1900 wireless range extender brought in by Netgear is capable of delivering amazing WiFi speeds up to 1.9Gbps and is easy to set up. Still, it has been found that a few users lack knowledge of doing Netgear AC1900 extender setup due to which they are unable to boost the internet range. In case you’ve also purchased the same WiFi device and are looking for instructions to set it up, you’ve landed on the right page. Here, we’ve not only covered setup instructions but have also shed light on the steps to update the AC1900 range extender and reset it. Apart from this, we’ve tried to address a few issues related to the same WiFi device. So, read on.
How to Set Up Netgear AC1900 Extender?
Since we’ve already mentioned that the AC1900 range extender can be easily installed, we won’t waste time introducing it. Given below are the steps that will help you to make your device up and running by accessing mywifiext.net.
- After unboxing your brand-new AC1900 device, arrange its accessories and power it up.
- Your extender is supposed to be seated in the room where your host router is placed.
- Now, using a network cable, connect the range extender and the WiFi router.
- Switch on your Windows computer or laptop.
- The next step is to run an internet browser that is flaunting the latest software version.
- Go to the address bar and type mywifiext.net.
- Hitting Enter will load the AC1900 extender login portal.
- Input the extender’s default password and username and select Log In.
- Follow the on-screen prompts.
AC1900 WiFi Extender Setup via Mywifiext.local
In the previous section, you got to learn how to configure the range extender via mywifiext.net. For your information, the aforesaid URL will work only on Windows devices. Just in case you have Mac or Linux devices, you are supposed to use mywifiext.local web address instead of mywifiext.net.
The rest of the instructions to set up the extender will remain the same. However, if you still feel like needing a helping hand to get your device configured using a Mac or Linux system, do not hesitate to ping our team. No matter whether you want to set up the AC1900 range extender or some other extender model, you’ll always find them on their toes to help you out.
Netgear AC1900 Extender Firmware Update
Performing firmware updates regularly is an essential practice that every user owning a WiFi range extender is advised to follow. It is because installing the latest firmware version on the device is all about saying goodbye to minor bugs that might be affecting its efficiency. Therefore, we can conclude that doing firmware updates improve the performance of the extender. Highlighted below are the instructions that will assist you to equip your AC1900 WiFi range extender with the latest firmware version:
- Establish a finger-tight connection between your range extender and the main router.
- Now, download the latest firmware file for your AC1900 WiFi device.
- Open a new tab on the browser and access the extender login portal.
- Log in to your range extender using valid details to reach the Status page.
- Click the Menu icon [hamburger button].
- On the Netgear AC1900 WiFi extender setup wizard, click Firmware Update.
- Select the Browse button as soon as the next page shows up.
- Find and select the firmware file.
- Lastly, click the Upload button and let your extender get updated.
Netgear AC1900 Extender Not Working?
Many events have been observed where users are unable to make the most of their AC1900 devices after completing Netgear WiFi extender setup. The reason is the non-working status of the extender. What to do in this scenario? This section will reveal. But, let’s have a quick glance at the factors that can make your extender non-functional.
Among numerous factors impacting the working status of the extender, the improper power supply, an outdated firmware, and an incorrect distance from the main router are the major ones. Therefore you are suggested to do the following to get rid of the problem related to the extender’s functionality.
- Power up your extender using a non-damaged wall outlet only.
- Make the AC1900 extender and router gap optimal.
- Install the latest firmware version on your range extender using the information provided in the previous section.
Netgear AC1900 WiFi Extender Reset
The non-working status of the extender is not the only issue faced by AC1900 users. Sometimes, they face major problems with the extender including red light issue and authentication error. In that scenario, resetting the device is the ultimate hack. It is because performing a factory reset provides the user with an opportunity to begin everything from scratch i.e. he/she will be able to set up the extender again. Mentioned below are the instructions that will help you reset the Netgear AC1900 extender.
- Ensure that your AC1900 is receiving a continuous power supply.
- Disconnect the extender from the router.
- Find the button labeled “Reset” on the extender and push it.
- Let the factory reset process get completed.
After resetting the device, do Netgear AC1900 extender setup again by accessing the default web or IP address. The default IP address for major WiFi extenders is 192.168.1.250. However, we advise you to refer to the AC1900 extender’s user manual as it may vary.