Netgear WN3100RP Setup
NETGEAR WN3100RP is a UNIVERSAL PASS THROUGH WIFI RANGE EXTENDER which is known to extend the WiFi coverage outside the range of the host router or gateway. WN3100RP works like a bridge between the router as well as the client device. In order to access the network of the extender, one needs to connect the client device to its network name ending with EXT. This guide talks all about how the NETGEAR WN3100RP SETUP process can be executed. With that said, you ought to continue reading.
Netgear WN3100RP Detailed Installation Process
1. Find the Best Location
The NETGEAR WIFI EXTENDER SETUP process can be initiated if you find the best location of your extender. A good connection gets established when there is a clear line of sigh between the extender as well as the router. Not just this, but the same rule applies to the distance between the extender and the client device. In case the path is blocked by electronic devices, concrete walls, or transmitting appliances, it can cause setup issues.
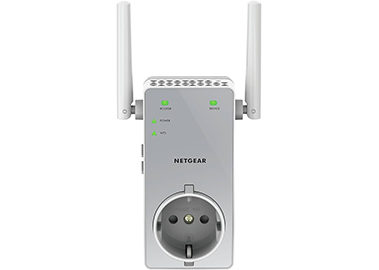
2. Plug in and Adjust Antennas
As soon as you are done placing the extender at its ideal location, plug it into a wall socket, the one located in the same room where the host router. Once done, it is recommended that you adjust the antennas on the WN3100RP extender. Ensure that they are facing upwards. This will make signal emission as well as transmission easy for your Netgear WN3100RP wireless range extender in the long run.
3. Extender Port Connection
The next step in line is to connect the WN3100RP to the host device. This can be done with the aid of a damage-free Ethernet cable. Plug one end of the cable to the port located on the WN3100RP extender and the other one on the internet port of the host router. Ensure that the cable connection is finger-tight. Now, use an Ethernet cable again, but a different one to connect the extender to the computer you are using.
4. Log in to the WN3100RP
On your computer, open an internet browser and enter MYWIFIEXT.NET or 192.168.1.250 in the address bar of your internet browser. Ensure that the web address is not being entered into the search bar even by default. Press the ENTER key and wait to get prompted to enter the username and the password. Refer to the LABEL of the extender and enter the required ADMIN LOGIN CREDENTIALS. The Netgear WN3100RP setup wizard will appear.
Now What Needs to Be Done?
As soon as the Netgear WN3100RP setup wizard comes into view, implement the steps given there. Amidst the installation process via 192.168.1.250, you will also get asked to update the extender to its latest version. If you feel that you have the time to go about the process, it is recommended that you do not think twice before executing it.
For your information, if you want to skip the firmware update for now, you can. You can later log in to the extender and then go about the process. As far as the instructions of the process are concerned, you will find them in the user manual of your product.
Got Stuck with Issues After Netgear WN3100RP Setup?
Many users lose their minds as they get stuck with extender-related issues right after they are done performing the installation process. In case you are amongst them, it is suggested that you reset the networking device.
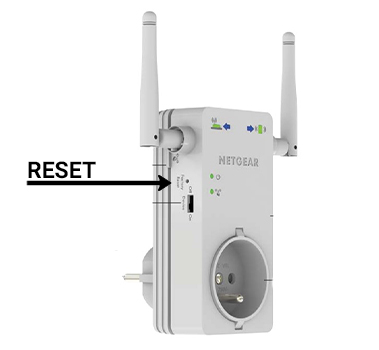
You can put the RESET BUTTON to use in order to RESTORE the device to the FACTORY SETTINGS. To learn in detail about the execution of the process, read these steps:
- Find the FACTORY RESET hold and insert a PAPER CLIP into it.
- Hold the button until the power LED becomes AMBER in color.
- Release the button after holding on for some time.
- All the LED lights located on WN3100RP will turn OFF for 3 SECONDS.
- Then, the power LED LIGHT will become SOLID GREEN.
Considering this process restores device to the factory default settings, you will have to execute the Netgear WN3100RP setup process from scratch using the steps give above.