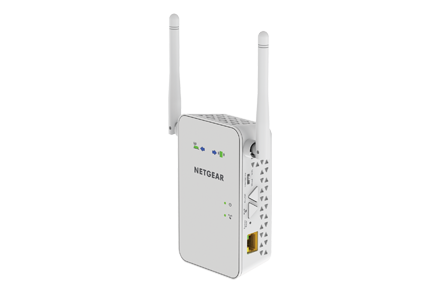
Netgear EX6100v2 Setup
Netgear WiFi extender EX6100v2 is generally installed to extend the WiFi range of the existing access point. Right after purchasing the Netgear model EX6100v2 range extender, you got to configure it with an already existing home network. The entire setup process is very simple and you can do it on your own. We have provided you with in-detail information about the Netgear EX6100v2 setup process on this page. You simply need to follow these instructions and get through the setup process comfortably and in a hassle-free manner.
Netgear EX6100v2 Setup Procedure
To set up your Netgear AC750 WiFi range extender, you can use any of the three methods mentioned on this page. It completely depends on you which method you want to opt for.
Method 1: Netgear EX6100v2 Setup via WPS
We begin the Netgear AC750 setup extender guide with the easiest method, i.e. the WPS method. The instructions are as follows:
- First of all, unbox your Netgear EX6100v2 WiFi range extender.
- The Netgear extender and the host router need to be placed in the same room before you begin setting the extender up.
- Now, plug its power cable into an active power socket and turn the power button on.
- Next, locate and push the WPS button on it.
- Likewise, push the WPS button on the host router as well.
Both devices are connected now. That’s it! Netgear EX6100v2 setup is done. Although this method is very simple, it is valid only for the WPS-enabled routers. If you do not own one such router then you can use any of the next mentioned methods.
Method 2: Netgear EX6100v2 Setup via Web Browser
Now, we will discuss the next method of Netgear extender setup for which you need to use mywifiext.net to access the Netgear login page on a browser, hence the name web browser method. Here are the instructions:
- Bring the Netgear range extender into the room where the router is placed.
- Plug in the Netgear EX6100v2 WiFi range extender into a well-working and active wall socket and turn the power button on.
- Power up the host router too.
- Now, use an Ethernet cable to connect the range extender to the router.
- Use your computer or laptop and visit mywifiext.net to access the Netgear extender login page.
- Enter the default admin login credentials in the fields on the login screen and click on the Log In button.
- You will be shifted to the Netgear Genie smart setup wizard.
- Finally, keep following the prompts that you view on your computer screen to complete the Netgear EX6100v2 setup process.
Here, we are done with our second method of setting up the Netgear range extender. For your information, you can refer to the Netgear EX6100v2 manual or user guide that you have received along with the device. Also, know that the default 192.168.1.250 IP address can also be used to log in to the extender login page.
Method 3: Netgear EX6100v2 Setup via Nighthawk App
We shall now talk about how to complete the Netgear EX6100v2 setup process using the Nighthawk app. This app can be used to complete the initial setup process and also manage the Netgear extender. The instructions for the Netgear EX6100v2 setup process using the Nighthawk app are as follows:
- Unlock your smartphone and download the Nighthawk app from the App Store or the Play Store.
- Launch the app as soon as it is installed.
- Fill in the username and Netgear EX6100v2 default password in the designated fields.
- Tapping on the Log In button will take you to the Netgear Genie smart setup wizard.
- Follow the instructions you see on the screen and you are done with setting up your Netgear EX6100v2 WiFi range extender.
There you are! You can now begin accessing the Netgear EX6100 WiFi range extender’s network on various devices.
What’s Next?
Right after you are done setting up your Netgear range extender, you are required to do these things:
1. Relocate Netgear EX6100v2 Range Extender
During the setup process, you have placed the extender near the router. After the setup process, you need to move the extender to a new location. You need to move the extender near a place where you want to extend the existing network. However, you also need to keep in mind that it should be placed within the router’s range. Also, keep it in an open area and away from other devices that can cause WiFi interference.
2. Change Login Password
The Netgear EX6100v2 default password is available all over the internet. This makes your network easily accessible to others. It is your responsibility to secure your WiFi. So, you need to change the default password to a secure one. You just need to access the Netgear EX6100v2 login page and change the password. While doing so, make sure you are not using any general info like DOB, names, or commonly used words as your password. Use a strong password to ensure more security.
3. Update Netgear EX6100v2 Firmware
Access the Netgear extender’s admin dashboard and see if any firmware update is available to be installed. If it is, then right away get it installed on your device. It is recommended by Netgear to always have your extender running on the most recent firmware version to make the most out of it.
Need More Info?
This is all about how to complete the Netgear EX6100v2 setup process. In case you are looking for additional information on how to update the firmware or how to change any settings on your Netgear EX6100v2 WiFi range extender, then get in touch with our technical expert team at any point of time.