Netgear EAX14 Setup
The EAX14 WiFi extender by Netgear can create a mesh network with your existing router to provide seamless connectivity. If you want to connect to the internet without worrying about signal drop, then you should definitely perform Netgear EAX14 setup with your current router.
How to Set Up Netgear EAX14 WiFi Extender?
You can easily install the EAX14 range extender with the help of the Nighthawk mobile app. But, before that you should perform Netgear WiFi extender reset. It is done just to ensure that the extender runs on the factory default settings. Here’s how you can set up the extender using the app:
- Make sure that the EAX14 extender is placed close to the router and is powered up.
- Download and install the Netgear Nighthawk application on your mobile phone or tablet.
- Connect your mobile phone to the default WiFi network i.e. Netgear_EXT by accessing the WiFi utility.
- In case you do not know the extender’s WiFi password, refer to the extender’s label.
- The next step is to launch the Nighthawk app.
- If you are a first-time user, you will be prompted to create an account.
- Use your email ID and password for that.
- A few on-screen prompts will appear on the screen.
- Follow them to make your Netgear EAX14 extender up and running.
Note: You must enter the correct WiFi password of your router when the app prompts you to. Otherwise the setup process will fail. Also, avoid using the outdated version of the Netgear nighthawk app for the setup process.
Netgear EAX14 WPS Setup
You will be in luck if your host router has a WPS button. This will prevent you from getting through the lengthy process of following the in-app prompts. To complete Netgear EAX14 setup, you just have to press the WPS button on the router and then the extender in a time frame of 2 minutes. If the router supports dual-band radio, press WPS buttons twice. This approach is also helpful for Netgear AX1800 setup.
What Does EAX14 WiFi Extender Manual Consist Of?
Like all Netgear devices, an EAX14 range extender also arrives with a user manual. This manual consists of everything related to the extender. You will find here the:
- LED description of the Netgear EAX14 extender
- Ports and button related details
- Instructions to connect to the internet by various methods
- Steps to perform WiFi extender reset
- Instructions to change the default login details by accessing the 192.168.1.250 IP
- Information regarding the extender firmware update
- WiFi extender security details
How to Log in to Netgear EAX14 via Web Browser?
After setting up the extender via the Nighthawk app or the WPS method, you can log in to it via a web browser and change its different settings. You can also install the latest firmware on the extender after logging in to it. The steps given below will let you understand how to log in to EAX14 WiFi extender by accessing the mywifiext login URL:
- Connect your PC to the Netgear extender network via an Ethernet cable or WiFi.
- Load an updated internet browser now.
- Into the address field, input mywifiext.net and press Enter.
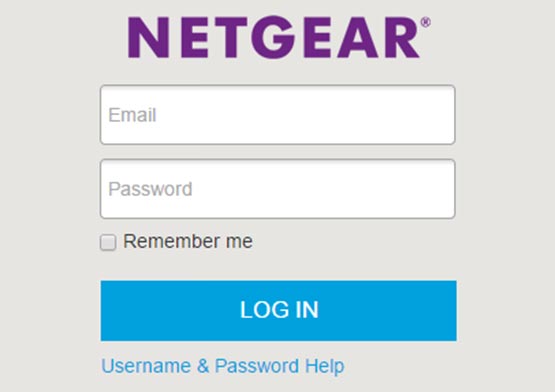
- A login window will show up.
- The username will be admin.
- Into the Password field, type the password that you specified to your Netgear EAX14 extender while installing it.
- The username and password are case-sensitive.
- Click Log In.
- You will be taken to the Netgear EAX14 STATUS page.
In this manner, you can log in to your Netgear EAX14 extender. You must remember that the mywifiext.net address works on Windows PC only. If you have a Mac device, you should proceed via mywifiext.local.
How to Update Netgear EAX14 Firmware?
You have to install the latest firmware version on your extender on a regular basis to ensure its smooth functioning. Follow the instructions given below to update the firmware of your Netgear EAX14 range extender:
- Download the latest firmware file for your range extender on your PC by visiting the Netgear Download Center.
- If the file needs to be unzipped, do it right away.
- On the browser’s new tab, go to mywifiext.net.
- Log in to the extender using its login details.
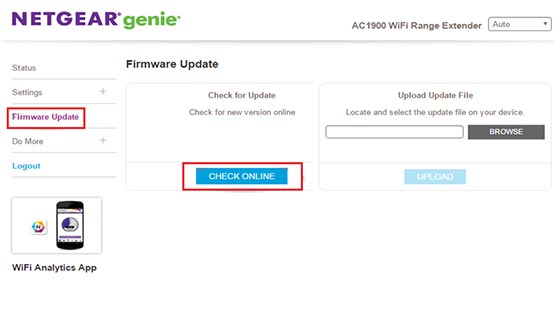
- On the dashboard, look for the Firmware Update option under Administration.
- Find the Upload button and upload the firmware file.
- Wait until the firmware gets updated and your EAX14 reboots.
Quick Tip: Avoid switching off the extender or disconnecting it from the router during Netgear EAX14 firmware update. This might interrupt the process.
How to Reset Netgear EAX14 Extender?
You might need to reset the extender if it is not working as per your expectations. The steps to reset the extender are given below.
- Ensure that your extender is getting a stable power supply.
- Look for the Reset button and press it using a sharp object.
- Hold the button for 7-15 seconds to complete the reset process.
In this manner, you will be able to reset your Netgear range extender. But, know that you will have to complete Netgear EAX14 setup once again after that. However, you can avoid registering your extender at MyNetgear portal if already done.