Netgear Extender Setup
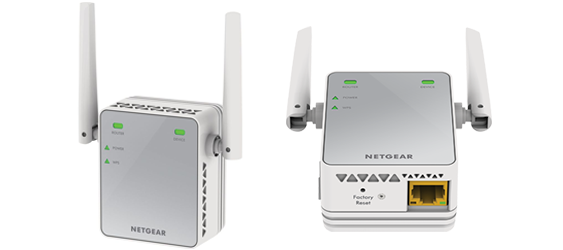
A WiFi Range Extender is an easy and effective way to boost the existing WiFi network range and coverage. Your Netgear WiFi range extender setup process is quite easy and doesn’t need much technical expertise. There are different models of Netgear extenders ranging from EX8000 AC3000, EX7500 AC2200, EX7000 AC1900, EX6250 AC1750, N300, EX6110 AC1200 to WN2500RP N600. Lots of users are unable to access the internet throughout their home or workplace due to widespread dead zones. Essentially, dead zones are places where users get no or poor WiFi connectivity. So, the best way to transform these dead zones into fun zones is Netgear Extender Setup.
In order to manually perform the WiFi Extender Setup process, continue reading this A to Z guide.
Netgear range extender is a plug and play device. It also comes with a Netgear Extender Manual which guides you through the process of how to setup Netgear WiFi extender. But the extender setup instructions given in the manual are quite hard to understand for a regular user. As the manual is very small in size, so it often gets misplaced or lost while unpacking the new WiFi range extender. That’s why it is best to know how to setup Netgear extender using the installation steps mentioned here. In case of any doubt with the Netgear range extender setup process, you can also get in touch with our experts at any time.
Before we help you with how to setup Netgear WiFi extender, let’s first discuss the prerequisites used for Netgear Extender Setup.
Netgear Extender Setup Essentials
It is extremely easy to perform the Netgear range extender setup and configuration. But before getting started with the Extender Setup, you must have the following things along with you:
- The extender’s proximity to the router. In layman’s language, the extender and the existing WiFi router should be placed in the same room.
- The WiFi range extender must receive a proper and fluctuation-free power supply from the wall socket.
- Followed by it, you must access a high-speed internet connection throughout the Netgear Extender Setup process.
- Next comes an internet browser. However, it is suggested you install more than two web browsers on your computer or laptop. It may happen that you fail to access the default Netgear Extender Login page just because of the web browser issue. In this scenario, you can opt for another browser (as you have options!).
Once you have all these essentials, you are good to go with the Netgear Extender Setup process.
Netgear Extender Setup via Mywifiext
Users can execute the Extender Setup in two different ways: using mywifiext and the WPS method. Let’s get to know how to setup Netgear extender using these methods.
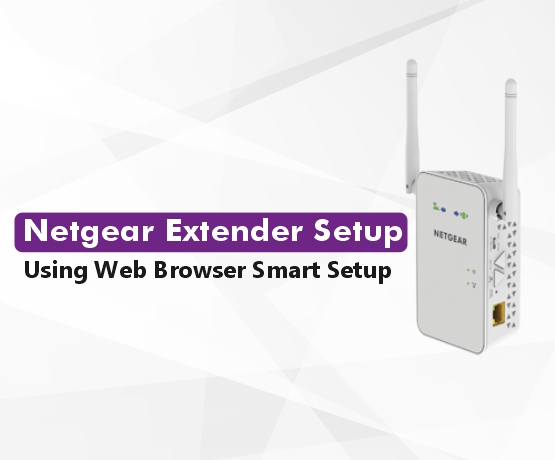
Netgear Extender Setup Using Web Browser Smart Setup
This method requires you to access a web browser for Netgear range extender setup. Let’s have a quick look at the Netgear Extender Setup steps:
- At first, plug the extender into an electrical outlet and turn it on.
- After that, open a web browser and go to mywifiext.net web address.
- It will open the default Netgear Extender Login page.
- Fill in the username and passphrase and click on the login button. If you experience any sort of issue during login such as username and password being incorrect or the Netgear range extender setup page doesn’t appear, get immediate technical assistance from our experienced technicians.
- Now, hit the button that says New Extender Setup.
- A form will open asking for your basic information such as name, password, email, etc.
- Fill in the form completely and click on the Next button.
- You will now see the Netgear Genie Smart Setup Wizard.
- This wizard will provide you with on-screen prompts on how to set up Netgear WiFi extender.
All you have to do is simply follow these prompts carefully and complete your Extender Setup. After the Netgear range extender setup, you can change the extended network name or SSID and password as per your choice. Now, you are free to enjoy fast internet connectivity throughout the home or office.
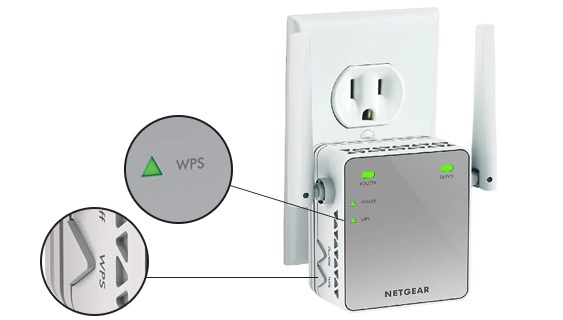
Netgear Extender Setup Using WPS Method
WPS refers to WiFi Protected Setup – the easiest way for Extender Setup. With this method, you need not to enter any password or access any web browser to install your WiFi extender. Here’s how to setup Netgear extender with WPS button:
- First of all, power on your extender after plugging it into a wall socket.
- Now, find the WPS button on your extender.
- Once found, press the button.
- You will see a blinking WPS light on your extender. It means your extender is connecting with your router.
- In case your extender doesn’t connect to the router, contact our experts’ team and resolve the issue immediately.
- If your WiFi router provides support for 5 GHz network band, repeat the same procedure.
- Green 5 GHz Link Rate power LED on your extender signifies the successful Netgear WiFi Extender Setup.
That’s how to setup Netgear extender without using the extender manual.
Netgear WiFi Extender Setup – Ethernet Method
In the event that your home wireless router doesn’t support WPS, use an Ethernet cable connection for Netgear range extender setup. Let’s shed some light on how to perform WiFi extender setup using the Ethernet method:
- Keep your Netgear range extender in the same room as that of your WiFi router.
- Take an Ethernet cable and insert its one end into the extender while another to your home router.
- Now, power on your extender and router.
- Have access to your PC or laptop and launch your preferred web browser.
- Type mywifiext.net in the address bar and press the Enter key.
- The Netgear WiFi extender setup page displays.
- Create an account using your email ID and password.
- Hit the Continue button.
- Enter the security settings for your extended WiFi network.
- Click on the Continue button.
- Let the extender apply the setting changes.
- Finally, hit the Finish button to complete the Netgear WiFi range extender setup process.

In this way, you can perform the new extender setup via an Ethernet connection. Netgear_ext SSID will be the name for the new, extended wireless network. So, enjoy an uninterrupted internet connection all over the house. In case you get stuck at any step while connecting to Netgear_ext, contact our experts and know how to setup Netgear WiFi extender without any hassle.
Netgear_ext Setup
Netgear_ext is the default extended network name or SSID once you are done with the Netgear WiFi extender setup. In order to access Netgear_ext (SSID) network, all you need to do is:
- Turn on your device.
- Open the WiFi network manager on it.
- A list of the available WiFi networks will appear on the screen.
- Choose your network and hit the Connect button.
Once done, enjoy a hassle-free internet connection all over the home.
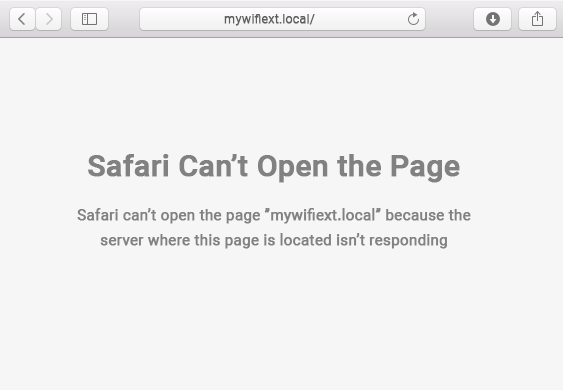
Can’t Access Mywifext?
Getting issues while accessing mywifiext during Netgear_ext WiFi Extender Setup? Worry not! In this particular troubleshooting section, you will get to know various solutions to fix major problems while setting up your WiFi range extender.
- Make sure that your extender is getting proper power supply from the mains. For this, you can check the power LED of extender – it must be solid green.
- If you are setting up the extender on Mac OS or iOS device, use mywifiext.local web address.
- Keep in mind to use the correct login web address only.
- If you are unable to access the Netgear Extender Login page, use the default IP address for login rather than the web address.
- Reboot your main router and the Netgear_ext extender.
- During the WiFi Extender Setup, place the extender and router in the same room.
- Access Netgear_ext (SSID).
- Follow the aforementioned setup steps carefully and in the exact given order if you have lost the extender manual.
- Try to update the web browser version.
- Also, remember to update the Netgear extender firmware to the latest version after a successful Netgear WiFi Extender Setup.
If you are still facing any issues with your Netgear Extender Setup, connect with our well-trained and knowledgeable technicians via email or chat. They will resolve all your technical problems within minutes.