A WiFi extender helps to extend the existing coverage range from a WiFi router. But you first need to connect the extender to the router. This post will help you configure your WiFi extender using iOS devices. Read on to learn more about it.
Let’s Install WiFi Extender Using iOS Device!
In this post, we are going to use a Netgear extender as an example. You can use the same process to install the WiFi extender of any brand.
There are three different devices that we are going to use to carry out the Netgear WiFi extender setup with the host router.
1. Extender Setup Using iPhone
Netgear has an application that can be installed on the phone to configure and manage the Netgear devices and home network. This app can be downloaded on Android as well as iOS smartphones. Use the instructions discussed below to use the Netgear Nighthawk app on an iPhone to install the extender.
- Go to the App Store on your iPhone.
- Look for the Netgear Nighthawk app.
- Install the app. Ensure that you are installing it from the Netgear official platform.
- Meanwhile, connect your WiFi extender to the host router with the help of a LAN cable.
Insert the LAN cable in the Internet port of the WiFi extender and the LAN port on the main router.
- Verify that the LAN connection is finger-tight and move ahead.
- It is now time you power on the router as well as the WiFi extender.
- Join the extender’s WiFi on the iPhone now.
Get info about the default SSID and password from the Netgear extender on its label or in the user manual.
- Launch the app that you just installed on your iPhone.
- If you haven’t created a Netgear account yet then create one now.
- Use the Netgear account details to sign in to the app.
- Follow the prompts that appear on the app to complete the configuration of your WiFi extender.
2. Using Mac OS Devices
You can use Apple desktops and laptops to configure the WiFi extender. This is the browser based setup wherein you need to use the login URL mywifiext.local. The steps highlighted below will help you get your extender setup done:
- Place the WiFi extender close to the router during the installation process. Later on the extender should be moved to a new place.
- Now, either make a LAN connection between the devices or choose to get them connected wirelessly.
- You can now supply power to the devices. The first device to be powered on should be the router and then the WiFi extender. Know that the sequence is important.
- Connect your Mac OS device to the extender’s network. Either make a wired connection or choose the WiFi SSID and password of the extender to connect.
- Run a browser. You can use Safari, Chrome or any other that’s installed on your Mac OS device.
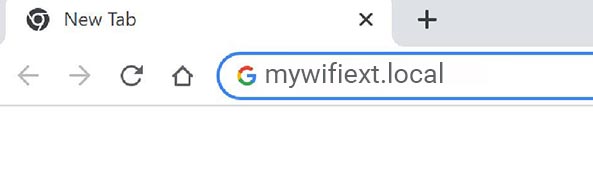
- Insert mywifiext.local in the address bar of the browser and hit the Enter key on the keyboard.
- You will be taken to the extender setup wizard. Click on New Extender Setup.
- If prompted, enter the admin username and password to log in.
- Assign a new admin password now and answer two security questions. These will be used to recover the password in case you forget it in the future.
- Select the main router’s network to be extended.
- Create network names and passwords for both 2.4 GHz and 5 GHz network bands.
- Keep following the instructions as they appear on the screen.
- On the final screen you will see the configuration settings made by you. Click Save and you’re done.
This way you can install Netgear WiFi extender using the Mac OS device using the URL mywifiext.local. If the URL does not help you then you can use the IP address 192.168.1.250. It works the same way.
3. Extender Setup Using iPad
If you want to use an iPad for the WiFi extender installation, then you can install the Netgear Nighthawk app to get through the job. The steps should remain the same as in the first section.
In case you want to use the browser method, then use the steps provided in the second section.
In the End
It is expected that you have found the information provided in this post very useful. We hope that you have used the instructions from this post to configure your WiFi extender using the iOS or Mac OS device. Your extender is all set to provide you with an extended network range even in hard-to-access areas of the home.
