So you have MAC filtering enabled on your internet router and are using a WiFi extender that’s already in the allowed list. Is it happening so that the devices that you trying to connect to your extender do not have internet access? The reason why this is happening is the MAC filtering feature. Keep reading ahead to learn what you can do to connect the devices to your WiFi extender with the MAC filtering enabled on the main router.
Why Can’t the Devices Connect to WiFi Extender?
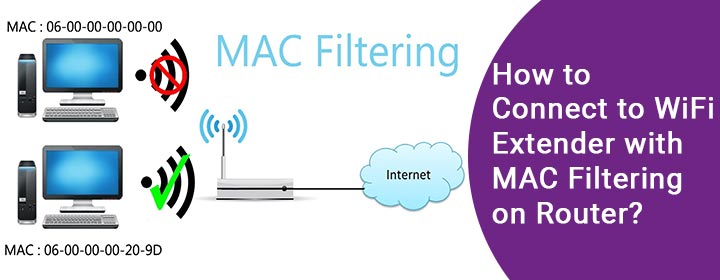
Let’s dig a little deeper to understand it better. MAC filtering is a security feature on networking devices that controls network access based on the MAC addresses of the devices.
Each device like a computer or mobile has unique address. The devices that you want to allow to connect to your router should have their MAC address listed in the Approved list. While the devices that you do not want to connect are to be listed among the Disallowed list category.
If you have your WiFi extender linked to the router, then you should add its MAC address in the Allowed list table. For example, you have a Netgear Wireless range extender. The devices that connect to your Netgear extender using either Netgear_Ext or LAN connection, will have their MAC addresses translated to a different virtual MAC address. This virtual MAC address is not added in the allowed list. Hence the devices have no internet access.
Connect to WiFi Extender When MAC Filtering on Router is On?
What you should now do is add the virtual MAC addresses in the list of allowed MAC addresses. This will allow these devices to get connected to the main network. The steps highlighted ahead will help you get this job done.
But before you begin, temporarily turn off the MAC address filtering feature on your root router. Thus, log in to your router’s GUI and turn the feature off right away.
Thereafter, follow the steps mentioned below. Let’s take the Netgear extender as a reference. The login URL for this extender is mywifiext.net. Use the respective URL for your extender to log in to its GUI:
- Switch on your WiFi extender and ensure that it’s properly connected to the main router.
- Connect all the devices that you want to connect to your extender. This includes all the wired and wireless connections.
- On a computer or laptop that you have connected to your extender’s network, run a browser to proceed logging in.
- Using the login URL mywifext.net, visit the login page. If using an iOS device, the address should be mywifext.local.
- Type in the login details on the login page to carry out the sign-in process.
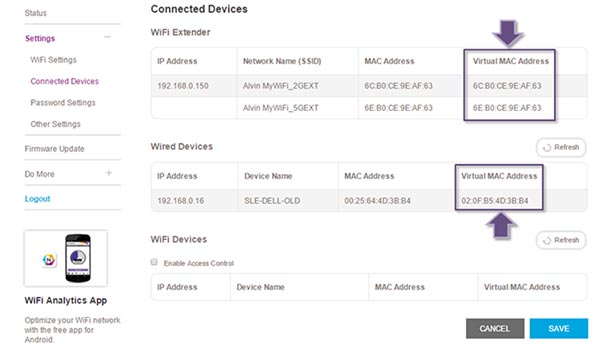
- Go to Settings > Connected Devices.
- Listed here are all the devices that are connected to your WiFi extender’s network.
- From the list, get the respective Virtual MAC address of the devices as well as the Virtual MAC address of your WiFi extender.
- Now, get to your router’s interface and go to the MAC filtering option.
- Enable the MAC Filtering feature again.
- Add the virtual MAC address of your wireless extender and all the virtual MAC addresses of all the connected devices.
- Apply the changes.
The End Note
Reboot your Netgear WiFi extender and the main router now. Once these two devices boot up you can connect all the client devices to your WiFi extender without any problem.
This is all about how you can connect devices to your WiFi extender with MAC filtering enabled on the main router.
