An access point is generally a device that picks up wired signal from the host (modem or router) and converts them into wireless ones so that you can connect WiFi devices to the internet. Netgear WAX204 is one such dual-band access point. To make the most of it, you have to complete Netgear access point setup first.
In this blog, we will cover every necessary detail related to the setup process of the WAX204 access point. But, before that, you must be very sure that you have access to a non-damaged Ethernet cable and your internet connection is working fine.
Netgear WAX204 Setup via Web Browser
The steps to set up the Netgear WAX204 dual-band WiFi access point are mentioned below. For your knowledge, the access point will run in the router mode by default. You can change the operating mode to access point if the host gadget is a router or a device with WiFi.
Step 1: Connect Access Point to Router/Broadband
- Unplug the broadband device provided by your ISP.
- Connect the Ethernet cable to the Internet port on the WAX204 access point.
- The other end of the cable should be connected to the LAN port of the broadband.
Step 2: Connect PC to Access Point
- On a WiFi-enabled PC or laptop, open the WiFi manager.
- Find the WiFi network of your WAX204 and connect to it.
- The SSID and WiFi password is printed on the access point’s label.
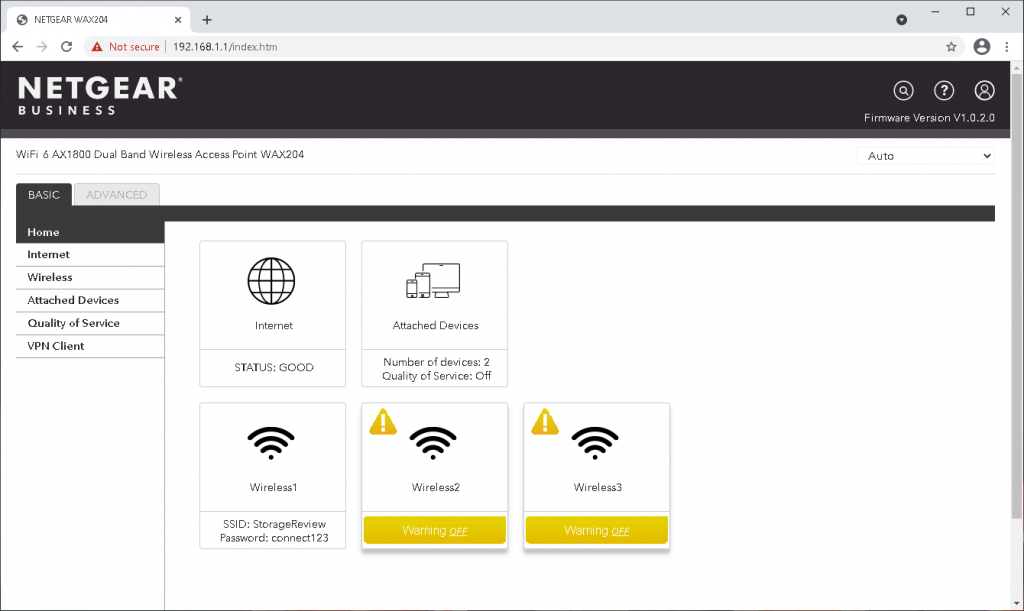
Step 3: Log in to Your Netgear Access Point
- Load an internet browser now and go to routerlogin.net.
- The Setup Wizard will open.
- Follow the prompts to:
- Set up a new login password for the WAX204 access point
- Assign a new SSID and WiFi password to your AP
Note: If the WiFi connection between the PC and access point gets terminated, reconnect using the new SSID and WiFi password.
Step 4: Select the Country and Region
- Log in to your access point again using the updated admin password.
- If a new firmware is available, install it.
- Set the country or region where you want to use the Netgear WAX204 access point via the path:
- Advanced > Advanced Setup > Wireless Settings > Region.
- Configure settings according to environment and security requirements.
Identify if your broadband/cable/DSL device is a router or modem. If the device does not broadcast WiFi, you should change the operating mode of your AP to access point. If the broadband device is a DSL device or a cable without WiFi, keep the access point in the default router mode.
Step 5: Change to Access Point Mode
- On the BASIC Home page, select Advanced > Advanced Setup > Router/AP/Bridge Mode.
- Select the AP Mode radio button on the next window.
- Click Apply.
The settings are saved now and your access point will get a new IP address like 192.168.1.250 from the main gateway. In case you want to log in to your AP again, you can use the routerlogin.net URL. Do not forget to register your product at MyNetgear portal.
How to Update Netgear WAX204 Access Point Firmware?
Here are the steps explaining how to update the firmware of your Netgear access point via the web-based management utility:
- Connect your PC directly to the AP’s WiFi network or you can use a LAN cable.
- You also have an option to connect the PC to the same WiFi network to which your WAX204 is connected.
- Access routerlogin.net and log in using updated admin password.
- On the BASIC Home page, select Advanced > Administration.
- Click Firmware Update > Check.
- The information regarding the new firmware version will be displayed if available.
- If you want to download and install it, select Yes and let the access point’s firmware get updated.
How to Reset Netgear WAX204 Access Point?
You might need to reset the access point if you are not getting the desired performance. After the reset process, you have to set up the access point again. The reason being, a factory default reset will erase all the customized settings. Here’s what you should do:
<
- On the backside of your access point, find the recessed Reset button.
- Insert a straightened paper clip or a pin into the opening.
- Press the button for 5 seconds and let the Power light blink amber.
- The light will turn off as soon as you release the Reset button.
- After 30 seconds, the Power light will turn red for 5 seconds and then turn solid amber.
- Your AP will be ready again if the Power LED becomes green.
Note: The AP will restart if you press the Reset button for less than 5 seconds instead of getting reset.
The Conclusion
We hope that after reading the information given in this blog, you will be able to set up the Netgear WAX204 access point to improve the WiFi range.
