Netgear EX8000 (Nighthawk X6S Tri‑Band) Setup & Login
The X6S series of mesh extender has an extraordinary WiFi device model which is EX8000. Here you will get to know about how to complete the Nighthawk X6S setup (EX8000) mesh extender.
The setup will have methods of Nighthawk extender setup and troubleshooting tips which makes the installation error free.
Netgear EX8000 Setup (X6S)
EX8000 Setup via WPS
- Just plug the EX8000 into a wall outlet somewhere near your main router not halfway across the house. You’ll move it later if you want.
- Wait for the Power LED to turn solid white. Takes about a minute or two. If it doesn’t happen, yank it out, count to ten, try again. Yeah, seriously.
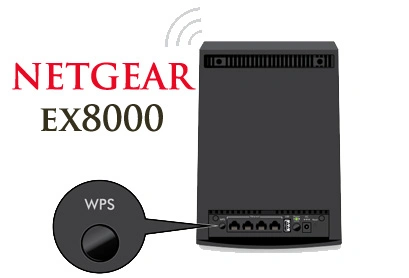
- Find the WPS button on your router. It’s usually labeled “WPS.” Might be on the back, sometimes it’s a tiny one you need a pen to press. Hit that first. The router needs to go into pairing mode.
- Within 2 minutes, press the WPS button on the EX8000. This part’s always a bit annoying – the timing matters. The extender’s WPS button is on the side. Press it, hold for 2-3 seconds.
- Watch the 5GHz LED if it goes solid white, congrats – the extender locked onto the router’s 5GHz signal. That’s what you want. If it’s still blinking after 2-3 minutes? Didn’t work. You’ll need to try again. Try moving the extender a little closer to the router and redo the steps.
- Repeat WPS for 2.4GHz if needed. Some routers do both bands automatically with one WPS press. Some don’t. If your extender’s 2.4GHz LED isn’t lit, press WPS again on both devices.
- The EX8000 will broadcast your existing Wi-Fi name – same SSID, same password. That’s the “mesh” part – no weird “EXT” networks.
Once it’s paired, you can unplug it and move it to a better spot ideally halfway between your router and the dead zone. Plug it back in, wait for the white LEDs again. If they turn orange or red? Too far. Move it closer.
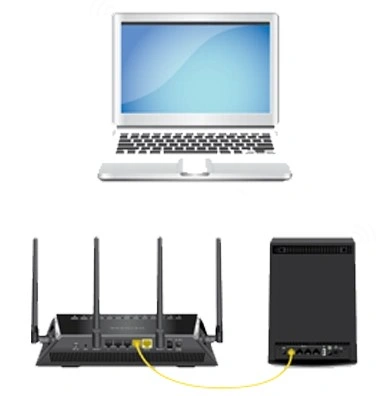
EX8000 Setup via Computer
First, plug the extender into a wall outlet somewhere near your router. Don’t go putting it in the garage yet. You need it close during setup. Give it like 2–3 minutes. It boots up slow. Lights will flash. Wait for the Power LED to go solid white. If it stays orange or off, unplug it, plug it back in, and give it another shot.
- On your computer (Windows or Mac, doesn’t matter), go to your WiFi settings and look for something like: NETGEAR_EXT
- That’s the extender’s temporary network. Connect to that. No password. Just click and go. Your browser might auto-launch the setup wizard. If it doesn’t:
- Open Chrome, Firefox, whatever, and type this in the address bar (not Google search): mywifiext.net. If that doesn’t work (sometimes it just refuses), try the IP:192.168.1.250
- If you made it here, congrats. You’re in the setup wizard. Click “New Extender Setup.” It’ll ask you to create some admin login.
- Make a username and password just for the extender – this is not your WiFi password. Also, it’ll annoy you with two security questions. Set them, but pick stuff you’ll remember (because if you forget, its factory reset time).
- It’ll scan for available networks. You’ll see your router’s name. Click on it. Then type in your actual WiFi password – the one for your main network.
- It’ll ask if you want to use the same name for the extended network or create a new one. Up to you. Hit next after entering the name and password.
This takes a minute or two. Don’t refresh. Don’t unplug. Once it’s done, it’ll tell you the extender is ready. It’ll also show the new network name(s). Reconnect your computer to the new extended network if you used a different name.
Netgear EX8000 Setup via Phone
Go to the App Store or Google Play and download the Netgear Nighthawk app. Once installed, open it.
- Connect to the extender’s temporary WiFi. Before you even touch the app, go into your phone’s WiFi settings and connect to Netgear extender network. Once you’re connected, then go back to the Nighthawk app.
- It’ll detect the extender and ask if you want to set it up. Tap yes, continue, whatever. Follow the prompts. It’ll scan for your main WiFi network.
- You’ll see your SSID pop up – select it, punch in the password for your main network.
- If the app says “Connection Successful”, you’re good. If it times out, don’t panic. Just go back into your WiFi settings, check if those extended networks are showing up. If yes, try connecting to them.
Once it’s set up and the lights are solid, unplug it and move it to a better spot – ideally halfway between your router and the dead zone you’re trying to fix. Plug it back in. Wait for the Power and WiFi LEDs to go solid white again. That means it’s connected.
EX8000 Mesh Extender Setup: Tips & Solutions
Connect Directly First
Plug it in near your router. Let it boot up takes a bit, be patient. Wait for the power LED to go solid white. Now, on your laptop or phone, look for a WiFi network like:
NETGEAR_EXT. Connect to that. No password. It’ll boot you into setup automatically – or just go to http://mywifiext.net in your browser if it doesn’t.
Use the Setup Page
Choose “WiFi Range Extender” (not Access Point unless you’ve got an Ethernet cable and want it wired). It’ll scan for nearby networks. Pick your router’s SSID, punch in the password.
Then it’ll ask you to name the extended networks. You can use the same name as your router for seamless roaming, but honestly? That broke things for me. Separate names are safer.
Placement Is Everything
Once setup’s done, move the extender halfway between your router and wherever your WiFi sucks. If it’s too far, it won’t get a good signal. If it’s too close, what’s the point? There’s a little signal light on the EX8000 – green is good, amber is meh, red means “move me.”
Got No Internet After Setup?
If the extender connects but no internet, it probably didn’t latch onto your router right.
Two things that fixed it:
- Factory reset (tiny button on the side, hold it for 10 seconds with a paperclip).
- Redid the setup from scratch. This time, made sure the extender got a strong signal from the router before finishing.
Firmware. Always Firmware.
Go to mywifiext.net, check for firmware updates. Mine was out of date right out of the box. Update it – makes a big difference in stability. Do this before moving it to its final spot.