It is not a secret that a Powerline adapter or extender connects to your home network through a LAN connection and then expands the network through electrical wiring. Various Powerline extenders are available in the market these days. Despite this, the product that has become the apple of everyone’s eye is the Netgear Powerline AV200 adapter. It generally works like all other Powerline adapters. But, the quality that differentiates it from other wired range extenders brought in by the same brand is that it comes with a configuration CD.
With that being said, the user does not need to access mywifiext.net to change the settings of the Powerline network. The CD will load the dashboard of the device and guide you through the configuration process. But, that’s another thing. Your first focus should be to install the Powerline device’s hardware in your house. How to do that? Let’s find out!
How to Add Netgear Powerline AV200 Adapter?
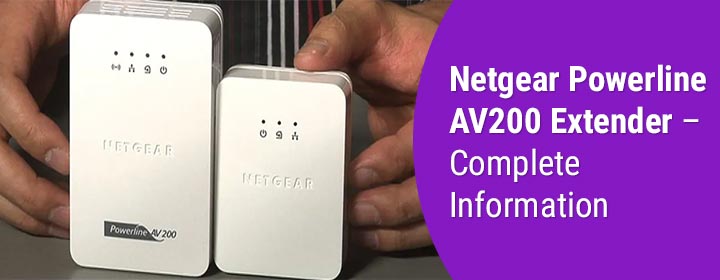
The Powerline network is formed when 2 or more Powerline adapters or extenders are added to the home network. The Netgear Powerline AV200 extender arrives with two units. It is completely your choice to pick any of them to share a direct connection with the host networking device. In addition to two hardware units, the package consists of a Resource CD plus an Ethernet cable. The Ethernet cable will serve the purpose of creating a direct connection between the AV200 Powerline adapter and the router (host WiFi device). The steps given below will guide you about how to use the electrical wirings and your host router to create a Powerline network:
- The very first thing you need to do is plug any of the Powerline adapter into a room where your host router is present. Let us label the room as Room 1 and Adapter as Adapter A.
- Now, pick the Ethernet cable that you received with the package and use it to connect your Powerline Adapter A and your host router.
- Turn on your Adapter A followed by the router. The Power light of your first adapter will become solid in a few minutes.
- The next thing you need to do is plug another adapter, let us say Adapter B into Room 2. If the Pick a Plug LED on your adapter turns red, you should connect it to another socket.
The moment you see the green or amber LED on the Adapter 2, it will get added to the home network. Your next task is to set up the Powerline network through AV200 extenders. The steps for the same have been discussed in the upcoming section.
Steps to Set Up Network via Powerline AV200 Extender
You now need to access the Netgear WiFi extender setup wizard on a computer to complete further configuration. Here’s how you can go about the process:
- Connect your computer or extender to the Powerline Adapter B for initial setup.
- You are supposed to complete the previous step with the aid of an Ethernet cable.
- Now, insert the Resource CD into the computer.
- In case your host router belongs to the Netgear brand, the setup Utility will automatically pop up and you will get a few prompts to set up the Netgear Powerline AV200 network.
- If you own a non-Netgear router or your router does not get detected by the Powerline CD Utility, you need to enter the settings manually.
- The network will get configured and you can disconnect the Ethernet cable from Powerline extender B.
- The extender can now be brought into a room where you are experiencing dead zones, let us say Room 3.
- Start using the internet through Powerlines!
This is how you can configure your Netgear Powerline AV200 extender through its Resource CD. Just in case your computer does not support CDs, you can use the WPS approach or simply access the management Utility of the Powerline extender through the 192.168.1.250 IP address.
Netgear Powerline AV200: LED Description
Since your Powerline network is now configured successfully, we want you to have a smoother networking experience. Getting acquainted with its LED description will help you identify and diagnose problems (in case you face any) with the Powerline network:
| S. No. | LED | Color | Description |
| 1 | Power | Solid green | Power is on |
| Blinking green | Adapter is restarting | ||
| Amber | Power Saving mode is active | ||
| Off | No electrical power | ||
| 2 | Pick A Plug | Solid green | Link rate > 80Mbps (Good connection) |
| Amber | Link rate >50, <80 (Average connection) | ||
| Red | Link rate is less than 50Mbps (not ideal) | ||
| 3 | Ethernet | Solid | Ethernet port is linked, but no activity |
| Ethernet port is active (data transfer) | |||
| There is no Ethernet connection |
Netgear Powerline AV200 Extender: Buttons
Apart from LED lights, the Powerline adapters have RESET, SECURITY, and ON/OFF buttons.
- The first button i.e. RESET serves the purpose of resetting the adapter to default settings. You need to keep it pressed for 1 second.
- When you press the SECURITY button on two Powerline adapters for 2 seconds within 2 minutes, a secure network is created.
- The ON/OFF button will help you with the wireless setup i.e. the WPS setup of the network.
Takeaway
Now, we’ve reached the end of the post shedding light on the installation process of a Netgear Powerline AV200 extender. Apart from this, you also got to know about its LED and button descriptions. We are now expecting that you will be able to make the most out of your wired network using the information given in the post.
