An access points perform the task of converting wired signals taken by a gateway into wireless ones. WAX620 is one such WiFi access point distributed by the Netgear brand. It can be easily purchased from the official site. But, the puzzle starts when the user doesn’t know how to set up the Netgear WAX620 access point. After all, the Netgear access point setup is a way different than Netgear router or extender setup. It requires accessing some special network and connections are also different. To understand this difficult procedure in a go, we have penned down this guide for you. Read on.
How to Install Netgear WAX620 Access Point?
You have the liberty of using a power adapter or a PoE switch to power up your Netgear access point. Thus, don’t worry if your AP hasn’t arrived with a power adapter. Just hardwire it to a PoE switch. However, there should be an internet connection on the switch.
Just in case, you have used a power adapter to supply electricity to your Netgear AP, you should hardwire your router or other networking device and the AP via the LAN or PoE+ port. The lights on your AP will start glowing. Here’s what you should conclude after seeing their status.
What Do Lights on WAX620 Mean During and After Setup?
| LED Light | Status | Meaning |
|---|---|---|
| Power/Cloud | Slow blinking Amber Solid green Solid blue |
WAX 20 is powering up Firmware is getting updated AP is attempting to obtain an IP from the host |
| LAN | Solid green Solid amber |
The LAN1 port has detected a 2.5 Gbps speed. A speed less than 2.5Gbps have been detected by LAN 1 port. |
| 2.4 and 5 GHz LAN | Solid green Solid blue Blinking blue |
The WiFi radio has no clients connected to it There’s at least one client connected Traffic is in process |
As you are now aware of the various colors flaunted by the AP, it is time to take a walk through its configuration steps. Move to the next section of the blog to learn about them.
Netgear WAX620 Configuration Steps
Three ways are there using which you can set up your AP. In the first two methods, you can use the remote management feature as the installation is done via the Netgear Insight Cloud Portal or the Insight app. The app dedicated for AP and Insight supported device. It is as similar as managing the Netgear router via the Netgear Nighthawk app. The third method only allows the local access to the network. You have to use a web browser in this case. Here are the steps that you are supposed to follow to configure your WAX620 AP via the Netgear Insight Cloud portal.
- Ensure your access points connection with the internet.
- Open a web browser on your PC and go to insight.netgear.com.
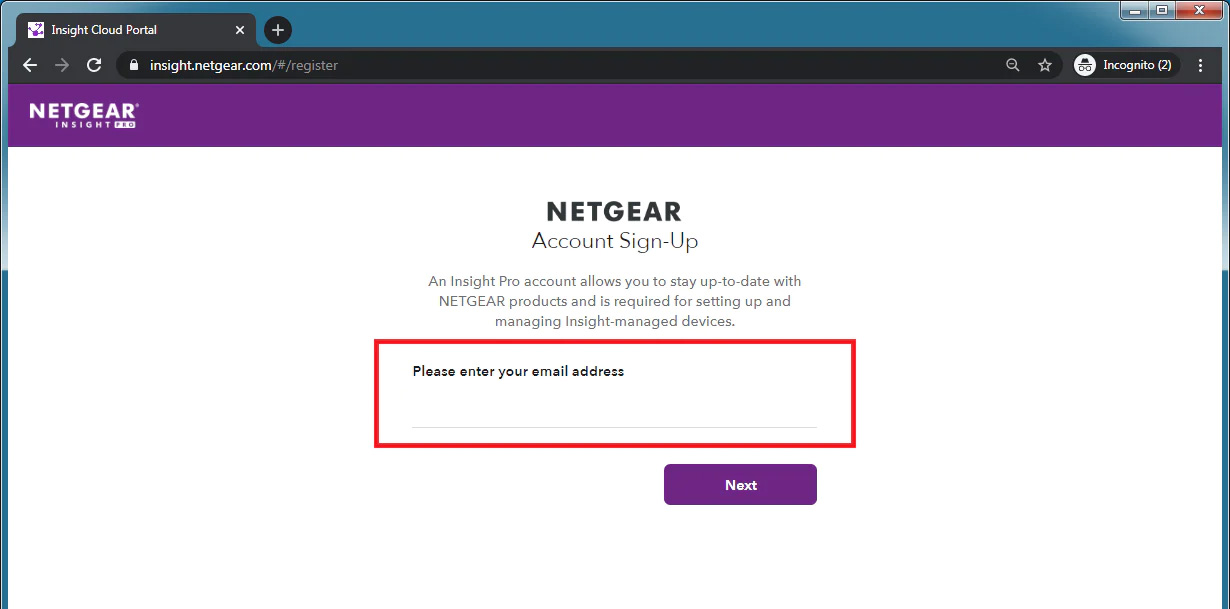
- Create a Netgear account using the valid email and password.
- Select Netgear Sign In.
- Choose the location for WAX620.
- Select the button labeled “+”. The button is called the Add Device button.
Note: Are you an Insight Pro user? You can add multiple Insight managed devices. Just upload the device list as a CSV file.
- You will now see the New Device pop-up window.
- Input the serial number of your Access Point (WAX620).
- Click Go.
- The Insight will now perform verification whether you have entered a valid product or not.
- This is the page where you can change the name of your AP.
- As soon as the Netgear WAX620 access point gets added to the portal, you will be informed that the setup is in progress.
- The firmware of the AP will be automatically updated.
- Your access point is now configured and an Insight managed device.
What is Netgear Access Point WAX620 IP?
The IP address of the Netgear access point will come to your help if you are configuring it as a standalone device. For this, you should join your desktop/laptop to your Netgear AP. Go to 192.168.0.100 with the help of an updated web browser. After that, login as needed and the rest of the process can be completed with the help of the on-screen instructions.
The Concluding Words
Here, we are now ending our post that described the setup and management process of a Netgear WAX620 access point. It is expected that using the Netgear Insight Cloud Management portal, you will be able to set up your AP. However, if you are unable to do it using the insight URL, go with the Netgear Insight app that can be easily downloaded from the Google Play Store and the App Store. If you are in the mood of setting up the AP as a standalone, you can go with the web browser-based method and accessing the Day Zero Easy Setup page. But, be sure that you are using non-damaged cables during the installation process.
