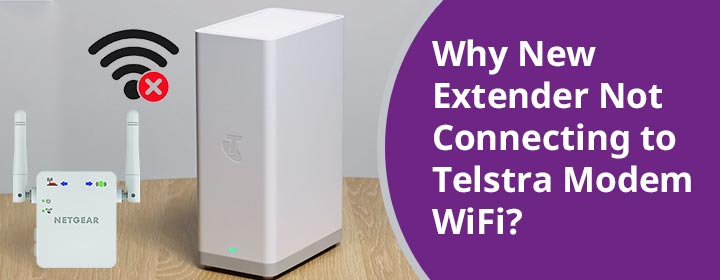
If you are trying to install a Netgear WiFi extender but can’t connect it to Telstra modem, then you must be wondering what has gone wrong. After all, you have followed the correct steps as mentioned in the user guide. But the Netgear WiFi extender setup seems next to impossible.
To help you out with the issue new extender not connecting to Telstra modem WiFi, we have written this blog post. Once you read the blog, you will have good insight into:
- Why is the connection between the two devices not happening?
- What you should do to connect the extender to modem?
Let’s get started and help you get rid of the issue that is currently troubling you.
New Extender Not Connecting to Telstra Modem WiFi: Fixed!
We expect that you have already installed the Telstra modem and have configured it properly. If the modem is not configured correctly, then connecting it with the new extender will be a tough job. Confirm this first and then use the troubleshooting process given ahead.
Reset the Netgear WiFi Extender
If it is not a new extender, then you must reset it first and have the factory settings restored on it. A Netgear wireless range extender can only be set up when it has the factory settings running on it. Resetting erases all the customized settings from the extender.
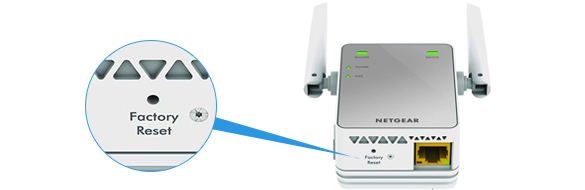
Even if it is a new extender, with multiple setup trials there are chances that it has some configurations running on it. You should reset it first and ensure that it is ready to be set up. That means it should be completely running on the default factory settings.
Resetting is a simple process that you need to follow first by paying heed to the steps given below:
- Switch on your Netgear extender.
- Ensure that the extender is fully powered up while you reset it.
- Now, find the Reset button on the extender. You can find it inside a hole.
- With the help of a sharp, pointed object, push and hold the button now. Make sure that the object that you’ve chosen can reach the button.
- You got to release the button after 10 to 15 seconds.
Netgear extender reset is now done. It has the default values restored. It is now ready for the setup process.
Let’s Connect New Extender to Telstra WiFi
You have two options to connect your extender to Telstra modem. One is by using the WPS method. However, since you are facing issue new extender not connecting to Telstra Smart modem WiFi, we suggest you using the web interface and installation assistant to carry out the process.
Here, you access the New Extender Setup page on your computer using web URL mywifiext.net or the default IP address. Let us tell you how to make the connection.
1st Step: Power Down the Devices
If the Telstra modem and Netgear extender are turned on, consider switching them off for a while now. You should first make the connections and then power on the devices to avoid getting stuck in any issue.
2nd Step: Make the Connections
With the help of a LAN cable, join the Internet port of the WiFi extender to the LAN port of the modem. Verify the connection.
Note 1: You can choose to connect your Netgear extender and Telstra modem wirelessly as well. Simply place them close to each other and while you are following the setup steps, they will connect to each other.
The next connection that you will make is between the extender and computer or laptop. First, power on your computer and use a LAN cable to connect it to the extender next.
Note 2: Although you can connect to the extender’s network using WiFi, we recommend making a LAN connection. This will help avoid any disconnections and hence you will not come across setup errors.
3rd Step: Power Up the Devices
Begin by powering up the modem first. Let the LEDs on it turn stable. The Power LED should be lit and stable that indicates a fully booted up modem. Likewise, plug in the extender and turn it on and observe the Power light on it too.
4th Step: Carry Out Setup Instructions
Finally, run a browser on your computer. You will directly land on the Netgear extender setup wizard. If not, then in the URL bar, insert mywifiext.local or mywifiext.net or default IP 192.168.1.250. Hit Enter and you will find yourself on the setup wizard with few prompts appearing. Execute the instructions and you will complete the Netgear extender setup.
Final Thoughts
This way you can carry out the Netgear wifi extender setup with the modem. We are sure that after you have followed the exact procedure as given in this blog post, you won’t get stuck with a new extender not connecting to Telstra modem WiFi issue.
You can now connect the devices in your home to the extender’s network and enjoy the extended WiFi.
